

Description
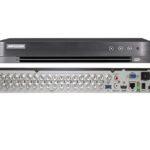
16 Channel Hikvision DVR Upto 4MP DS-7216HQ
In the realm of surveillance technology, the Hikvision 16 Channel DVR DS-7216HQ stands out as a robust and reliable choice. Designed to cater to various security needs, this DVR system is equipped with advanced features that ensure high-quality video recording, efficient storage management, and user-friendly operation. In this guide, we’ll explore the key features, benefits, and installation process of the 16 Channel Hikvision DVR Upto 4MP DS-7216HQ.

Key Features of the Hikvision DS-7216HQ
High-Resolution Recording
The Hikvision DS-7216HQ DVR supports up to 4MP resolution, ensuring that every detail is captured with stunning clarity. This high resolution is crucial for identifying faces, license plates, and other important details in surveillance footage.
16 Channel Support
With 16 channels, the 16 Channel Hikvision DVR Upto 4MP DS-7216HQ can connect to 16 different cameras simultaneously. This makes it an ideal choice for large properties, businesses, and multi-site installations, providing comprehensive coverage without the need for multiple DVRs.
Efficient Video Compression
The 16 Channel Hikvision DVR Upto 4MP DS-7216HQ utilizes H.264+ video compression technology, which significantly reduces bandwidth and storage requirements without compromising video quality. This advanced compression ensures longer recording times and efficient use of storage space.
Remote Access and Monitoring
Hikvision’s DVR comes with powerful remote access capabilities. Through the Hik-Connect app, users can monitor live feeds, review recorded footage, and manage settings from their smartphones or computers. This remote access provides peace of mind by allowing surveillance from virtually anywhere.
Advanced Motion Detection
The DVR is equipped with advanced motion detection features. It can send alerts and notifications to users when motion is detected in predefined areas. This functionality is essential for proactive security management and quick response to potential threats.
Easy Installation and Integration
The 16 Channel Hikvision DVR Upto 4MP DS-7216HQ is designed for easy installation and integration. It supports a variety of camera models and is compatible with other Hikvision devices, ensuring seamless integration into existing security systems.
Benefits of the Hikvision DS-7216HQ
Enhanced Security
With its high-resolution recording and advanced motion detection, the DS-7216HQ enhances overall security. Users can rely on clear and detailed footage to monitor activities and respond to incidents effectively.
Cost-Effective Surveillance Solution
By supporting 16 channels, the 16 Channel Hikvision DVR Upto 4MP DS-7216HQ eliminates the need for multiple DVRs, reducing overall costs. Its efficient video compression further cuts down on storage expenses, making it a cost-effective solution for large-scale surveillance needs.
User-Friendly Interface
The DVR’s user-friendly interface simplifies operation and management. Users can easily navigate through settings, playback footage, and configure the system according to their specific requirements.
Scalability
The 16 Channel Hikvision DVR Upto 4MP DS-7216HQ offers scalability, allowing users to expand their surveillance system as needed. Whether adding more cameras or integrating additional security devices, the DVR provides a flexible solution that grows with the user’s needs.
Installation Guide for the 16 Channel Hikvision DVR Upto 4MP DS-7216HQ
Step 1: Unpacking and Preparing
Unpack the DVR and ensure all components are present, including the DVR unit, power supply, mouse, remote control, and necessary cables. Choose a secure location for the DVR, preferably in a locked cabinet or server room to prevent unauthorized access.
Step 2: Connecting Cameras
Connect the cameras to the DVR using BNC cables. Ensure each camera is properly mounted and positioned for optimal coverage. Check all connections to confirm they are secure.
Step 3: Connecting to Power and Network
Connect the DVR to a power source using the provided power adapter. Connect the DVR to your local network using an Ethernet cable. This connection is necessary for remote access and monitoring.
Step 4: Initial Setup
Power on the DVR and follow the on-screen instructions for initial setup. This process includes setting up the date and time, configuring network settings, and creating user accounts with appropriate permissions.
Step 5: Configuring Recording Settings
Access the DVR’s menu to configure recording settings. Set up continuous, scheduled, or motion-triggered recording based on your surveillance needs. Adjust video quality settings to balance between clarity and storage efficiency.
Step 6: Remote Access Setup
Download the Hik-Connect app on your smartphone or access the Hikvision web portal on your computer. Follow the instructions to link your DVR to your Hik-Connect account for remote access. Test remote viewing to ensure it’s functioning correctly.


Reviews
There are no reviews yet.